Doing a push-up correctly is a great goal, a feat of strength, and something you often have to work up to! If you aren’t strong enough yet to do a push-up, have no fear, these push-up modifications will help you build up the strength needed to rock a solid push-up!
Let’s start out with the easiest push-up modifications and work up to a full push-up with proper form. Find where you are currently at, start there, and keep progressing!
Basic Push-up Form: Pushing!
Before we start, let’s talk about the most common problem I see with push-ups. We’re pushing, so just like you would push someone on the playground for being a punk to you in 1st grade, you’ll push the ground the same way.
No chicken wing arms, no elbows out to the side. You want to keep your hands in line with your shoulders, and as your arms bend, your elbows will go out at around a 45 degree angle. At your sides is 0 degrees, your arms chicken-winging out with your elbows as high as your shoulders is 90 degrees, and you’re looking for right in the middle. Here’s what I’m talking about:
This is what you want to do, only on the ground!
Proper Form
Another important thing to consider is keeping your spine in a straight line, including your neck. Of course you have a natural curve in your spine, but thinking about this will prevent things like sagging hips, butts in the air, and your head looking up or down at your hands. Straight line, friends.
You also want to keep your core engaged the whole time. This prevents a lot of problems. As you push your hands into the ground, tighten your abs so your whole body rises together.
And while we’re on the subject of common pushup problems, my dear yogis, be careful that you’re not treating a push-up like a vinyasa. When I train clients who dabble in yoga, I have to teach them to push-up all at once; they tend to have a time-lag between their chest and hips coming up.
Don’t be overwhelmed with form or cues. Start with the push-up that’s perfect for you and keep good form in mind, and it will become more natural with time! Now, let’s talk building strength!
Push-up Modifications to Build Up Strength
Push-ups for if You’re Just Getting Started
If you’re just starting out and are currently lacking in the upper body strength department, a wall push-up is a great place to start.
How to do it: Stand a few feet back from a wall. Keeping your hands in line with your shoulders, place them on the wall. Keeping tall and engaging your core, lower yourself as close to the wall as you can. You should be on the balls of your feet and your neck should be aligned with the rest of your spine. Don’t let your stomach sag. Push your hands into the wall to come back up.
Once you can do 15-20 reps of this version, full range of motion, you can step back a few more feet, like demonstrated in the video, or move to a table.
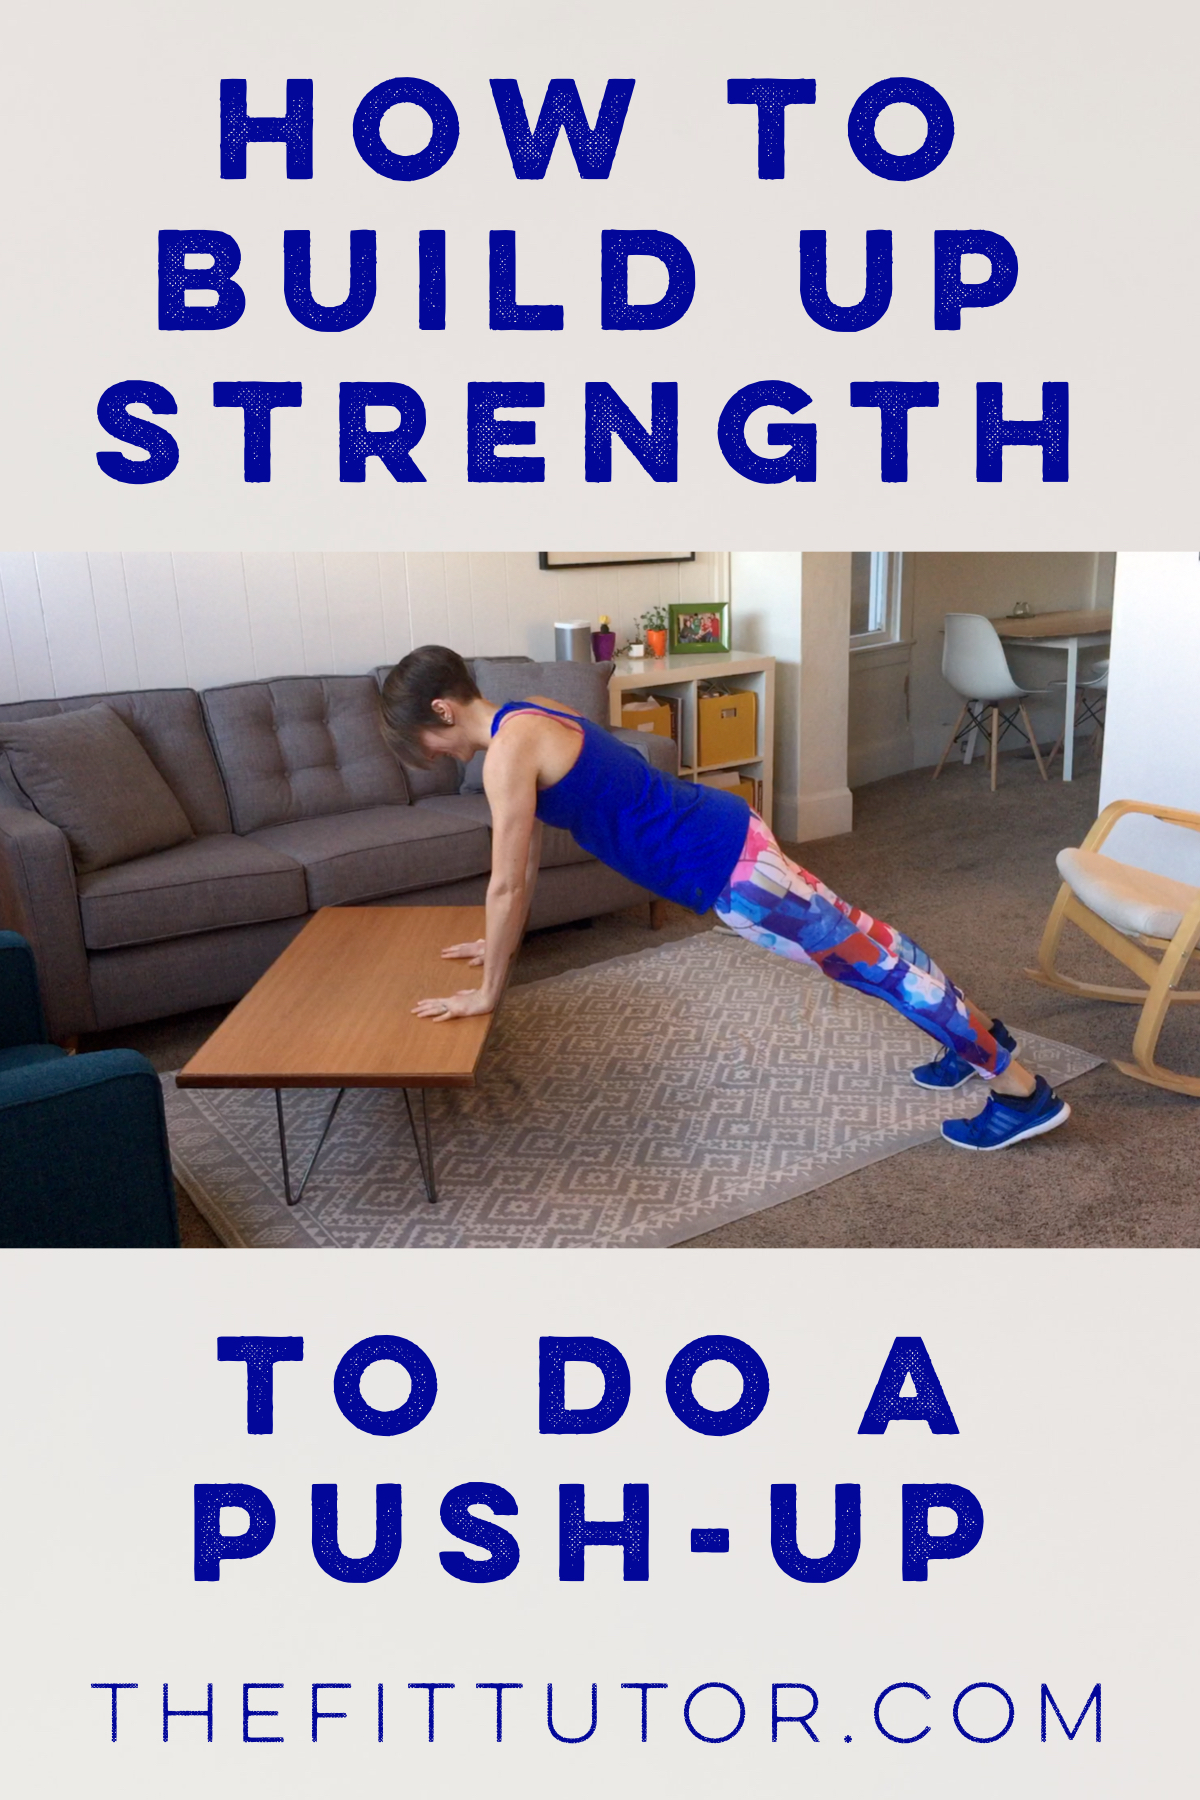
Push-Up Modifications: Table Push-ups
The more upright you are, the easier your push-up should be, so as you get stronger, increasing your angle will make it more challenging. Once you’ve conquered the wall push-up, a tabletop or counter push-up is a great next step. The tall back of a couch would work, too!
How to do it: place your hands under your shoulders and step back so your body is in a straight line. Keeping your core tight (no sagging!), lower yourself down as far as you can, and then push your hands into the table to come back up. Make sure you focus on the angle of your arms, too- 45 degrees (ish)!
Once you can rock the tabletop push-up no problem, as in 15-20 reps are easy-peasy, it’s time to drop to a little lower. Try a greater angle, like a coffee table, a chair, or seat of a couch.
Get Low: Coffee Table Push-up Modifications
Remember, the greater the angle you are, the harder it becomes. Work your way up to any progression by doing as many as you can the harder way, and finishing out your reps with the previous modification!
How to do it: Place your hands under your shoulders/chest on the edge of a coffee table or chair- just make sure it’s a sturdy surface! Keep your core tight, no sagging or butts in the air, of course. Slowly lower yourself down as far as you can go, and then push your hands into the surface, squeeze your core, and come back up to the top.
Go down as far as you can and work your way up to full range of motion. You can also do these on your knees and work your way up to legs extended! Just make sure your knees are far enough back so your body can be in a straight line.
Next Progression: Knee Push-ups
Finally! On the floor for more of a challenge! And can we agree that these are called knee push-ups and not “girl push-ups” like we learned in PE class?! I know a lot of men who can’t actually do a push-up and I know a lot of women who are complete and total bad@$$es, so… knee push-ups it is!
How to do it: Get on the floor and assume proper push-up position: hands underneath your chest/shoulders, your knees far enough back so your thighs to chest are in a straight line. You can place a pillow or towel under your knees if needed. Core engaged, contract your lower abs to make sure your lower back is protected, and perform your pushup. Go down as far as you can and work your way up to your nose (or boobs?! Whichever comes first!) touching the floor.
Make it more challenging by doing it slowly and controlled, before you move on to the real deal. Perfect 15-20 reps in good form before moving on.
I find that another baby-step progression is to get into the same position explained above, but uncross your legs and place your toes on the ground. Try this next (as seen in this video, too). Don’t forget that when-push-comes-to-shove arm angle, friends!
How to Get From Knee Push-ups to Real Push-ups
So most of the world tells you that you should be able do regular push-ups once you can do knee push-ups. But, life isn’t always so easy.
You can start by going down as far as you can while keeping good form in a regular push-up position for as many reps as possible, then finish your reps with knee push-ups. There are other ways than just toughing it out, though. I’ve got two in-between steps for you to help make your push-up dream a reality.
I like to start by having clients do eccentric-to-knee push-ups to help build strength.
Eccentric-to-Knee Push-ups
Here’s How: Get into the top of a regular push-up position. Hands underneath shoulders, core engaged, no sagging and keep your body in a straight line.
Slowly, and I mean slooooowly, lower yourself down to the ground. Drop to your knees, and then press up in a knee push-up. Step back into the top of a push-up position, and repeat. You could keep your feet on the ground, or cross your legs, and both are demonstrated in the video.
I recommend combining these with regular push-ups as you can to help build up strength!
Honestly, building up strength in your upper body to push up most of your body weight can take awhile, so don’t get discouraged! Keep on keepin’ on.
Trouble Spot Push-ups
If you’re dying to do a push-up to show off at your high school reunion, these “trouble spot push-ups” should help do the trick. They help build up strength at your weakest push-up points, and you can start from a straight arm plank position or lying on the ground, wherever you struggle the most. You’ll stop either at or just before where you usually “fail” at your push-up, and do a few little pulses, and then return to whatever position you started with. They will help you gradually increase your range of motion as you build strength!
It might take a lot of combo-sets to finally get a whole set of legit push-ups in. What I mean by that is mixing knee push-ups with regular, or eccentric halvsies with regular, or if you’re just starting out, table push-ups with coffee table push-ups, etc. Continue to reduce the number of reps with the easier version, and increase the reps with the harder version to slowly build up your strength.
Keep at it for the Perfect Push-up
If this is a big goal of yours, work hard at it. Doing push-ups can make you feel super-tough, and it’s an overall important sign of health. Think: in an emergency, it’s helpful to be strong enough to get yourself off the floor if needed.
I’d recommend progressing through these in order, moving on to the next once you can get 15-20 reps in good form. Give your muscles a break, they will need a day in between to rest and recover (and get stronger!).
Recap of Push-up Modifications
- Wall
- Table
- Coffee Table
- Knees on Floor
- Knees and Feet on Floor
- Eccentric-to-Knee and/or Trouble Spot Push-ups
- Pushups!
I’d recommend shooting for 2-3 sets of 15-20 reps of whatever modification you can do, combining harder and easier modifications if necessary! Try this 3-4 days per week, giving yourself a rest day in between. It’s completely natural for your muscles to get tired after working them, so don’t be discouraged after 1 or 2 sets if you need to drop to something easier to keep good form. Those reps will count, too!
Here’s the end goal (although my arms were tired after filming all these videos, ha!):
Your core strength will help, too, so ab work can help you conquer your push-up goal!
I’d love to hear how these go. Share this, save it, and most importantly, DO IT! Report back and update me on your progress! Let’s end with some encouragement about the benefits of a push-up:
- works several muscles: most of your upper body and core
- helps create balance and stability
- teaches your muscles to work together
- builds muscle: increases metabolism and definition
- helps fight age-related weight gain
- strong core is important for fighting back pain and improving posture
I’m excited you’re working towards this goal! I’m cheering you on! And The Fit Tutor offers full body strength training workouts you can do anywhere, to help burn fat and tone up! Check out what we have to offer here!
Oh, and PS if you like my pants, my cousin freaking made these! How cool! Check out Love This brand on his Instagram. Shoot him a message if you want any!

Comments are closed.